

วิธีตั้งค่า DNAT บน FortiGate สำหรับ LAN ภายในองค์กร
อัพเดทเมื่อ: 14 พ.ค. 2025
ผู้เขียน: Saprayworld
- Network
- Server
สอนตั้งค่า DNAT (Destination NAT) บน FortiGate แบบ LAN-to-LAN อย่างละเอียด พร้อมตัวอย่างการตั้งค่า Virtual IP, Firewall Policy และ Static Route
วิธีทำ DNAT บน FortiGate (LAN to LAN)
flowchart LR
PC["PC<br>172.20.0.100"] --- F["Firewall<br>Fortigate"]
F -.- G("Dummy Server<br>172.20.18.2")
F --- S["Server<br>172.20.1.8"]

style G stroke-width:2px,stroke-dasharray: 2
1. สร้าง Virtual IP (VIP)
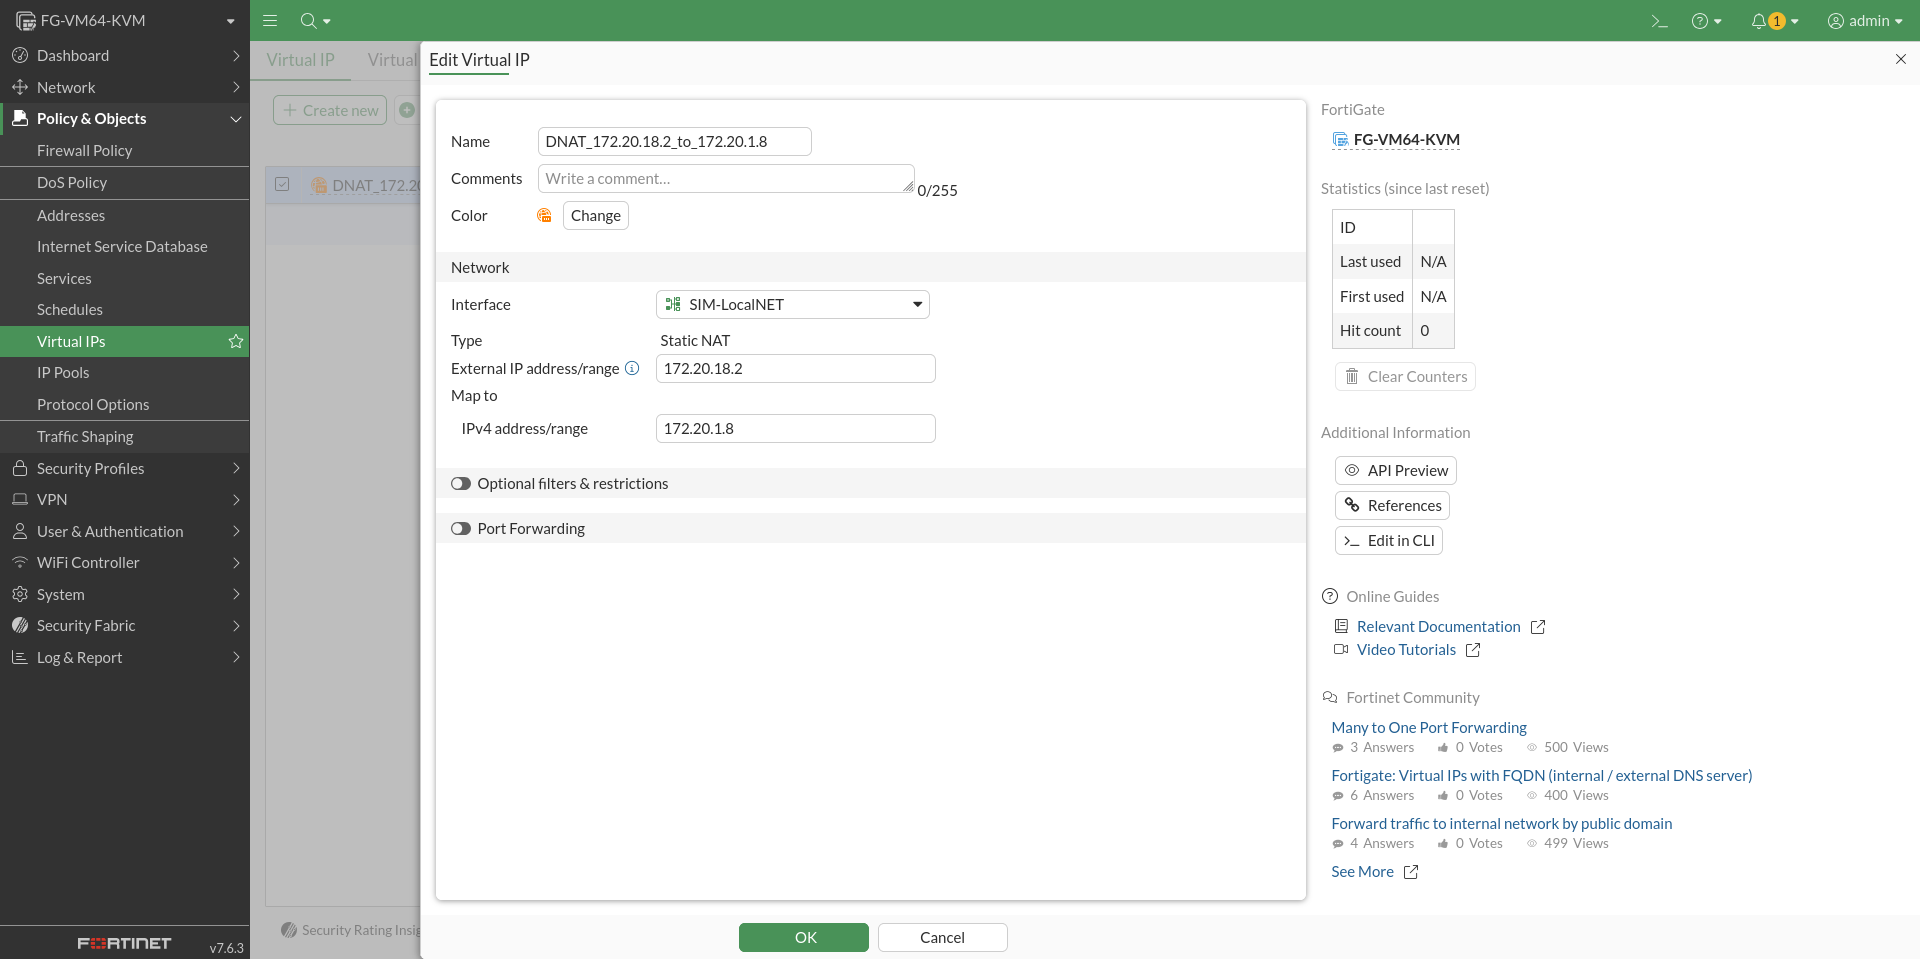
ไปที่ Policy & Objects > Virtual IPs แล้วกด Create New:
- Name: เช่น
DNAT_172.20.18.2_to_172.20.1.8 - Interface: เลือก interface ที่รับ packet จากฝั่ง source (ในที่นี้อาจจะเป็น interface ที่เชื่อมกับ
172.20.0.0/24) - External IP Address / Range: ใส่
172.20.18.2(คือ IP ปลายทางที่ต้นทางจะยิงหา) - Mapped IP Address / Range: ใส่
172.20.1.8(คือ IP จริงที่เราต้องการให้ไปถึง)
2. สร้าง Firewall Policy
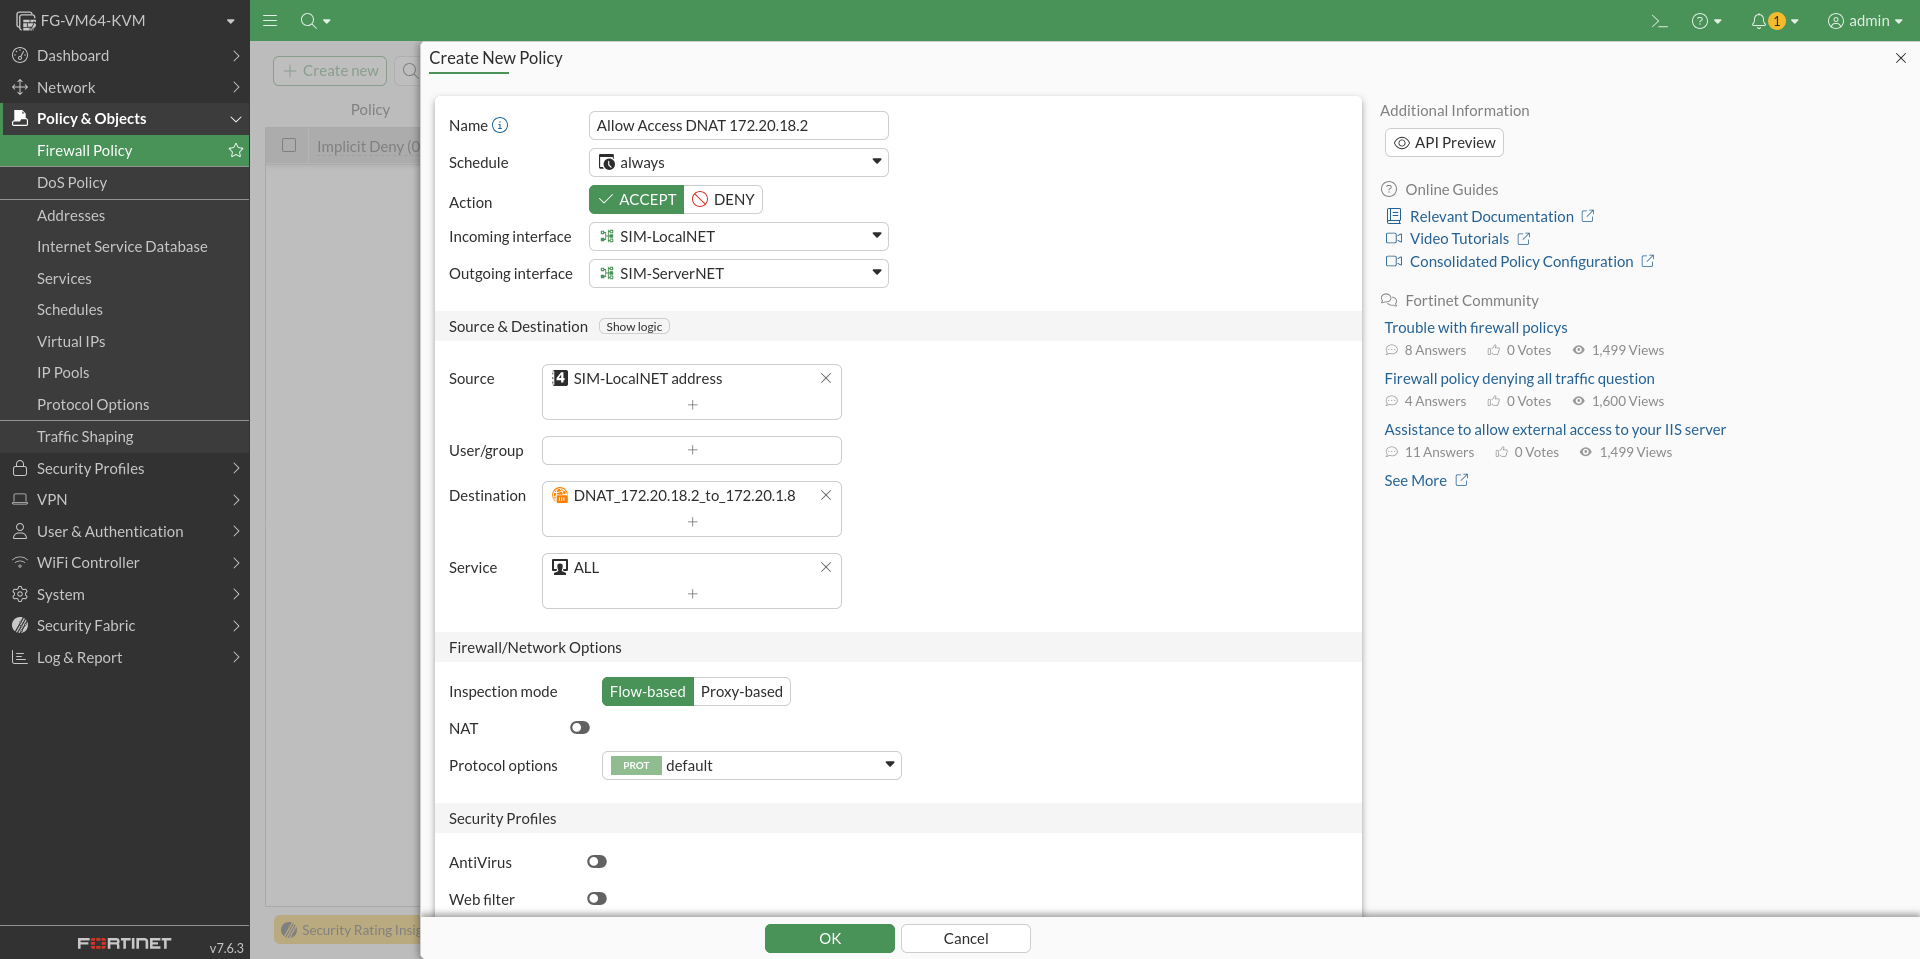
ไปที่ Policy & Objects > IPv4 Policy แล้วกด Create New:
- Incoming Interface: Interface จาก LAN ฝั่งต้นทาง (
172.20.0.0/24) - Outgoing Interface: Interface ไปยังปลายทางจริง (
172.20.1.0/24) - Source: ระบุ
172.20.0.100หรือ subnet ที่เกี่ยวข้อง - Destination: เลือก VIP ที่สร้างไว้ (
DNAT_172.20.18.2_to_172.20.1.8) - Service: ตามต้องการ เช่น
ALLหรือเฉพาะ port ที่ต้องการ - Action:
Accept - NAT: ไม่ต้องติ๊ก NAT (เพราะเราไม่ต้องการเปลี่ยน source IP)
3. ทำ Static Route แบบ Dummy (Optional)
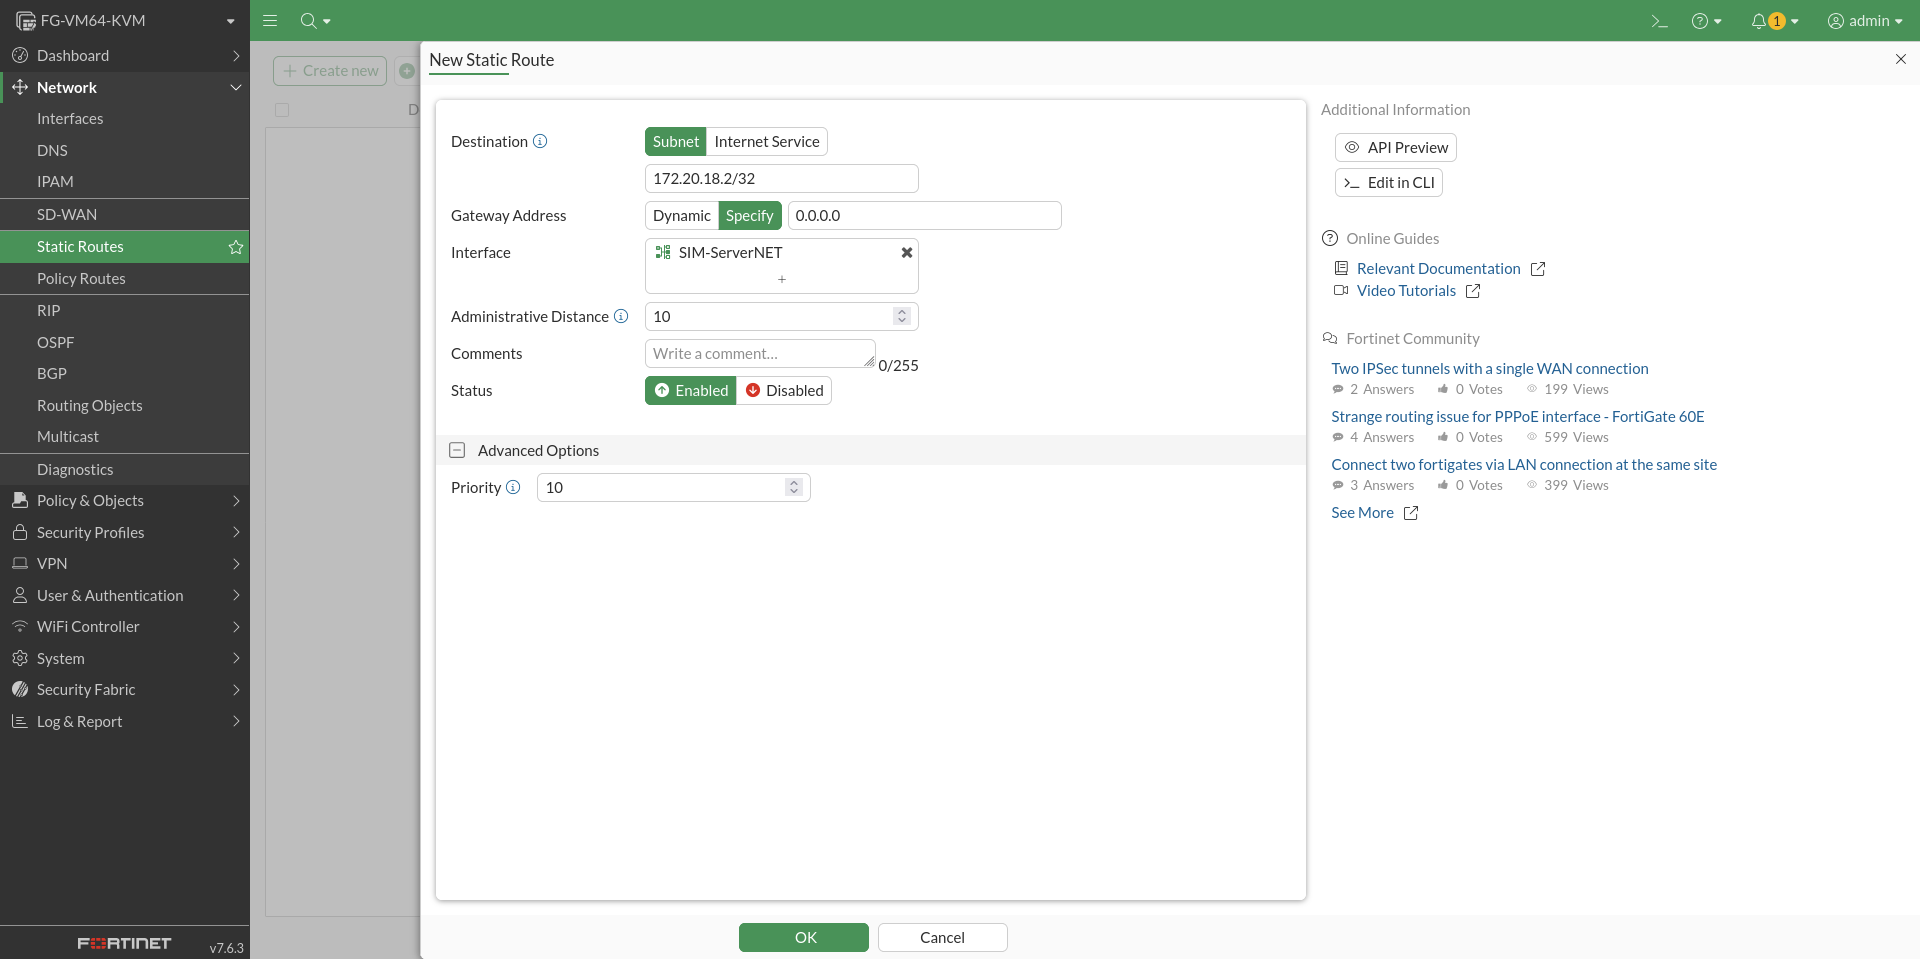
ในกรณีที่ปลายทางไม่มีอยู่จริง 172.20.18.2 เราต้องสร้าง Static Route ด้วย โดยชี้ไปที่ Default Gateway 0.0.0.0
ไปที่ Network > Static Routes แล้วกด Create New:
- Destination IP/Mask:
172.20.18.2/32(หรือ172.20.18.0/24ถ้าเราอยากรองรับหลาย IP) - Gateway: สามารถใส่เป็น
0.0.0.0 - Interface: ใส่ interface ที่รับ traffic มาจากฝั่ง LAN (หรือฝั่งที่ทำ NAT ก็ได้ เช่นเดียวกับ VIP)
- Distance: ให้ใช้ default (10)